DIY: Matting & Framing My Fantasy Art
Part 2
Tools & Materials
Acid free glue
Acid free mounting tape
Weights (stray books)
Ruler
In Part 1 I removed the art from the illustration board and measured and cut my mats. Using acid free glue in all four corners, I glue the two colored mats together.
I make sure the sides of the window of the mat line up evenly, and then weight the corners down with a few stray paperbacks to make sure the mats adhere to each other as they dry. By the way, I was framing 3 different paintings at this time, so the art and colors of mat board do change in the demonstration pictures.
Place the backing board right up to the top of the mat, top/surface/showing side facing down and use masking tape to keep it in place. Cut two or more acid free tapes to act as hinges and glue in place. These too may need a book weight on them to keep them in place until they dry.
When dry, remove the masking tape, and fold down the hinged double mat over the backing board. 3 finished mats, ready for use!
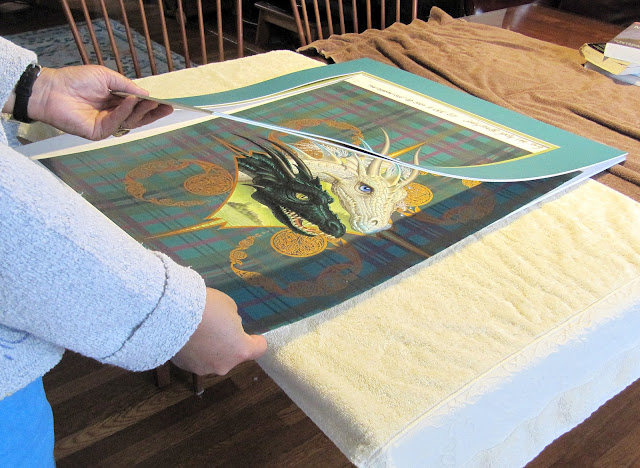
Lift the mat and insert the artwork.
If there are vertical and/or horizontal lines in the artwork, use a ruler to make sure they are parallel to the lines of the mat. Gently shift the art around and make sure no outside edges appear - the mat completely covers the art on all sides.
Tape the art in place with masking tape, carefully keeping the art in place with one hand.
Flip open the mat. With more acid free hinges, tape or glue the artwork in place at the top of the painting. Art and paper breathes and expands, especially depending on how much moisture there is in the air. So I attach the art only from the top so it doesn't wrinkle from being caught on the bottom.
And again, weight the hinges as they dry, 15 minutes to a half hour.
Remove the masking tape, fold back over the double mat, and the matting part of this tutorial is finished!
Part 3 will cover framing.
Jody
www.astudiobythesea.com
www.jodylee.org


